Category Archives: RMS

Top 3 reasons I should have adopted Outlook App for iOS a long time ago


1. Send Availability

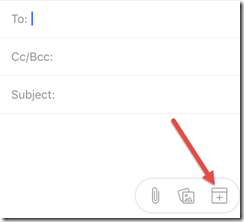
How often do we get an email like “are you available to meet tomorrow.”  Now, when I reply, I can click a button and select available time slots, and with one more button press, I can quickly send my availability! In this manner, it is actually more efficient than the current Outlook full client!  The closest thing we have to this in the full Outlook  client is the  ‘FindTime’ app in Outlook.

imageIMG_0035IMG_0036


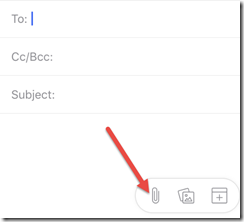
2. Attach Files or Photos while composing email

This is a huge advantage over the native iOS mail client, I still remember when I used an iPhone for the first time and could not find any way to attach a file to an email I was drafting. My friend snickered, “that’s because you have to go to the photo first, then click share, then draft your email.” Hmmm.. okay… I guess but that wasn’t completely obvious to me. So I love the more natural ability to attach a file after I start composing a new email. What I like even more is that it shows me files that have recently been sent to me in email, as well as files I have in my OneDrive (and other storage providers too).

imageSNAGHTML124db2f0

3. Consume RMS protected attachments sent from “RMS sharing app”

One of the main obstacles for adoption of RMS is the lack of support for it on mobile devices. Now, with the Outlook App for iOS, I can open RMS protected content when it is sent from the RMS Sharing App.  What doesn’t work is opening RMS protected email messages although it is apparently supposed to work according to this article (here). Perhaps it is a bug in the latest iOS client since it is listed as being a supported feature.

IMG_0030

No Significant Drawbacks

One of the features I liked about the native mail client in iOS is the ability for multiple mail accounts to be added (for example, the ability to quickly check both business and personal email accounts). Happily, this feature works the same in Outlook App for iOS,, and I have not found any other productivity loss.

I have occasionally come across a few instances where the Outlook App for iOS is not detected as a mail client, for example, in Safari it was not one of the default actions when I needed to forward a URL via email. I was able to easily add it to the Safari quick actions, so that wasn’t too difficult. I think there was one other native app that was looking for an account registered as a native account, which I no longer have, so it failed to work. Other than that one drawback, I am very happy with the new productivity enhancements I have gained.

So I have switched from using the native mail client in the iOS to using the Outlook App for iOS and so far I am only wishing I made this switch earlier!

An analysis of what is available in Azure RMS Usage Logging today

As a follow-up to my last blog post on “Configuring the Azure Rights Management Connector with a Windows FCI File Server,” RMS can log every request that it makes for your organization, which includes requests from users, actions performed by RMS administrators in your organization, and actions performed by Microsoft operators to support your RMS deployment.

There are three limitations with User Activity Logging. The first is that the log files does not include the document name that is being accessed. For example, RMS will log that an unauthorized user attempted to access a document with a content-id of {GUID} but unless you have access to the document with that {GUID} then you cannot correlate the content-ID to the document name. This presents a catch-22, how do you know which document to extract the content-ID from to begin with? (For a complete list of the log file contents, see Logging and Analyzing Azure Rights Management Usage on Technet).

I have to give the RMS team at Microsoft credit, because they are extremely responsive and interested in feedback. You can tell they really love this product and the success of the product means a great deal to them. They may soon release a powershell script that allows you to extract the content-id from each document, and then you could manually insert that into a SQL database that would contain a mapping of content-ID’s to document names. Keeping this SQL database updated would require a custom application to be written.

I am assuming that the content-id script will be posted to the RMS blog, Connect.Microsoft.com or the RMS Yammer group when it is made available, since that is the location of the last announcement of Azure RMS powershell scripts:
http://blogs.technet.com/b/rms/archive/2014/04/11/microsoft-protection-powershell-cmdlets-ctp2.aspx

It would be much easier if the RMS user activity log contained a direct reference to the full document path (not just the file name). Because a file name in itself is unique only within the directory it resides in, for example:

F:\Share\Bank1\Purchase Order.docx

F:\Share\Bank2\Purchase Order.docx

As you can see, only having ‘Purchase Order.docx’ added to the log is not sufficient during a forensic analysis. Technically you could extract content-id from all documents named Purchase Order and then compare that to the log, but again, that is not efficient.

So my hope is that when Microsoft adds detail to the log file, that they consider adding the full path and not just the file name. It would be even better if the path included the server name too, because otherwise you might have two servers in your organization like this:

Server 1 > F:\Share\Bank1\Purchase Order.docx

The contents of Server 1 are replicated via DFS to an off-site DR server named Server 2:

Server 2 > F:\Share\Bank1\Purchase Order.docx

So in this scenario, having DFS log the path without the server name would not tell you which server was trying to be attacked.

A second limitation to configuring a Windows FCI File Server with RMS is that it will only protect Microsoft Office file types. Although Azure RMS does have the ability with the RMS Sharing App to create “pfiles” – this functionality is not built into the Windows FCI File Server API, and there is no command-line version of the RMS Sharing App. So if you needed to automate the enforcement of all files on a file share, (including having RMS protect both Microsoft and Non-Microsoft file types), you could use the recently announced Microsoft protection powershell scripts (currently in Community Preview on Connect.microsoft.com) to create pfiles against non-Microsoft file types. You could also write your own .NET app using the Azure RMS SDK 2.1 with the File API). Writing a script to traverse a file structure to perform this and have it run as a scheduled task would take a decent amount of development effort. Hopefully the script could be written to apply the same Azure RMS Template that the FCI file server is using for consistency.

A third limitation has to do with automating the log file parsing. For example, if your organizational security policy requires that you are notified when an unauthorized access attempt occurs, then you would need to write a program to access the logs directly on Azure storage. There are currently two vendors who are writing software to provide this level of logging and you can contact me at Joe dot Stocker at CatapultSystems.com and I can introduce you. Otherwise the only out of box option now is to use a powershell cmd-let to download the log files and then manually open each log file to inspect them for unauthorized access. 

In Summary, the User Activity Logging that is available right now is sufficient for organizations that need to satisfy an audit requirements that unauthorized access attempts are logged somewhere. But outside of that narrow requirement, in practical terms, you would need to hire a company like Catapult Systems to write some custom code to alert you when unauthorized access takes place.

I would recommend that you ask the software developer to define the notification boundaries. For example, how do you define unauthorized access? Is it every time someone attempts to open a document that they do not have rights to access? Do you really care to be notified for failed attempts? Wouldn’t that fill up your inbox, and then you would start ignoring those emails? Or would you prefer to only be notify when an unsuccessful access attempt is followed by a successful access attempt (as this would indicate that a brute force attack was successful). Or perhaps you only care if greater than 10 access attempts occur rather than each individual one. As you can see, you will need to factor in some intelligence into whatever notification script you write yourself. My hope is that the commercial market will produce solutions that apply best of breed approaches to log forensics and notifications.

It would be awesome if Microsoft will add a report into Azure AD Premium for RMS logging analysis. Similar reports already exist, so theoretically it would not be too difficult for Microsoft to extend those rules into analyzing the RMS logs.

For example, here are the security reports included in the Azure AD base (free) followed by a comparison of what is available in AD Premium. The base offering has reports for:

  • Sign ins from unknown sources
  • Sign ins after multiple failures
  • Sign ins from multiple geographies

The Premium offering adds reports for:

  • Sign ins from IP address with suspicious activity
  • Irregular sign in activity
  • Users with anomalous sign in activity
  • Which users are most actively using an application
  • What devices a user has signed in from

Premium also offers email notification of anomalous behavior to Azure AD administrators. So what we (customers and partners) want is similar notifications for RMS activity logging for when documents are accessed using the same rules above. That should satisfy most audit requirements.


References

Logging and Analyzing Azure Rights Management Usage on Technet

http://technet.microsoft.com/en-us/library/dn529121.aspx

Configuring the Azure Rights Management Connector with a Windows FCI File Server

On March 4th, 2014, Microsoft announced the availability of integrating on-premise File Classification Infrastructure (FCI) file server with the Azure Rights Management service using the Azure RMS Connector.

http://blogs.technet.com/b/rms/archive/2014/03/04/windows-server-fci-file-classification-now-supports-azure-rms.aspx

“FCI refers to the File Classification Infrastructure, a capability in Windows Server-based File Servers using the File Server Resource Manager feature which enables the server to scan local files and assess their content to determine if they contain sensitive data, and if they do classify them accordingly by tagging them with classification properties you define. Once files are classified, FCI can also automatically take action on these files, such as applying adequate RMS protection to the files to prevent them from leaking beyond their intended audience. All this happens in the blink of an eye without the users having to take action” 

Note: Files can also be classified manually by modifying the properties of a selected file or folder. This is done on the server-side, or within a Windows 8 client system after a group policy has been applied (http://technet.microsoft.com/en-us/library/dn268284.aspx)

Prerequisites

  • FCI requires a Windows Server running 2012 or 2012 R2.
  • Azure RMS has been activated within your Office 365 Tenant.
  • Directory Sync with your o365 Tenant has been configured.
  • Users that need to work with the RMS documents have been granted the RMS license within the Office 365 Portal
  • Note: In my testing, the RMS Connector cannot be installed on the same server hosting the file share.

image

This walkthrough is for a stand-alone connector installation. For production deployments, a Hardware Load Balancer (HLB) and a minimum of two servers is recommended for high availability.

Download the RMS Connector here http://go.microsoft.com/fwlink/?LinkId=314106

Configuration Steps

Launch setup with Administrative Rights.

image

Enter your Office 365 Tenant Administrator Account information


image


image

Note: On the next screen, if you are deploying two servers for high availability, do not select Launch connector administrator console to authorize servers at this time. You will select this option after you have installed your second (or final) RMS connector. Instead, run the wizard again on at least one other computer. You must install a minimum of two connectors for HA.

image

To validate the installation, connect to http://<connectoraddress>/_wmcs/certification/servercertification.asmx, replacing <connectoraddress> with the server address or name that has the RMS connector installed. A successful connection displays a ServerCertificationWebService page.

image

Next, authorize the servers that can use the connector. As a best practice, create a group that contains these accounts and specify the group instead of individual server names.

image

Next, select the server role (ex: Exchange, SharePoint or an FCI Server)

image

Next, select an account used to authorize the selected role.

image

Note: It is important that you select computer accounts here, not user accounts. Best practice is to use a group rather than individual servers.

image

When finished adding servers, click close.


The next step will be to configure an SSL Certificate on the RMS Connector. To enable the RMS connector to use TLS, on each server that runs the RMS connector, install a server authentication certificate that contains the name that you will use for the connector. For example, if your RMS connector name that you defined in DNS is rmsconnector.contoso.com, deploy a server authentication certificate that contains rmsconnector.contoso.com in the certificate subject as the common name. Or, specify rmsconnector.contoso.com in the certificate alternative name as the DNS value. The certificate does not have to include the name of the server. Then in IIS, bind this certificate to the Default Web Site.

Configuring a Windows Server 2012 or 2012 R2 file server for File Classification Infrastructure to use the connector

Download the RMS Server Configuration Tool script (“GenConnectorConfig.ps1”) from here http://go.microsoft.com/fwlink/?LinkId=314106

Run this on the file servers that you authorized in the previous step. Set the powershell execution policy to allow the script to run if you have not already done so.

Get-help GenConnectorConfig.ps1 –detailed

GenConnectorConfig.ps1 –SetFCI2012 –ConnectorUri http://rmsconnector.contoso.com

After running the tool, Restart the File Server Resource Manager services, which refreshes the RMS templates on the server.

image

You can now Create classification rules and file management tasks to protect documents with RMS policies. See File Server Resource Manager Overview for more information.

For example, after the classification rules have been configured, you can Right-click a file in that folder, and then click Properties. Click the Classification tab, select the resource property you want to tag the folder and click the value, and click OK.

image

You can then create file management tasks to apply RMS protection to documents when the conditions have been met, example: when Department is Research and Development.

image

When this condition is met, on the Action Tab, you can select RMS Encryption and apply the template you would like to use.

image

Now when saving a document into that folder, it will automatically inherit the proper RMS Template.

image

By default, Azure RMS comes with two built-in templates, but you can configure your own through the Azure management portal http://manage.windowsazure.com

After creating a new template, Restart the File Server Resource Manager services, which refreshes the RMS templates on the server.

image


Next Steps: Configure RMS user activity logging

RMS can log every request that it makes for your organization, which includes requests from users, actions performed by RMS administrators in your organization, and actions performed by Microsoft operators to support your RMS deployment.

If you are only interested in the logging of administration tasks performed in RMS then you can obtain this with the Get-AadrmAdminLog RMS Windows PowerShell cmdlet. Otherwise, if you are interested how users are using RMS, you can use these RMS logs to support the following business scenarios:

  • Analyze for business insights.
    RMS writes logs in W3C extended log format into an Azure storage account that you provide. You can then direct these logs into a repository of your choice (such as a database, an online analytical processing (OLAP) system, or a map-reduce system) to analyze the information and produce reports. As an example, you could identify who is accessing your RMS-protected data. You can determine what RMS-protected data people are accessing, and from what devices and from where. You can find out whether people can successfully read protected content. You can also identify which people have read an important document that was protected.
  • Monitor for abuse.
    RMS logging information is available to you in near-real time, so that you can continuously monitor your company’s use of RMS . 99.9% of logs are available within 15 minutes of an RMS-initiated action.
    For example, you might want to be alerted if there is a sudden increase of people reading RMS-protected data outside standard working hours, which could indicate that a malicious user is collecting information to sell to competitors. Or, if the same user apparently accesses data from two different IP addresses within a short time frame, which could indicate that a user account has been compromised.
  • Perform forensic analysis.
    If you have an information leak, you are likely to be asked who recently accessed specific documents and what information did a suspected person access recently. You can answer these type of questions when you use RMS and logging because people who use protected content must always get an RMS license to open documents and pictures that are protected by RMS, even if these files are moved by email or copied to USB drives or other storage devices. This means that you can use RMS logs as a definitive source of information for forensic analysis when you protect your data by using RMS.

http://technet.microsoft.com/en-us/library/dn529121.aspx


References:

Deploying the Azure Rights Management Connector

http://technet.microsoft.com/en-us/library/dn375964.aspx#ConfiguringServers

The Storage Team Blog
http://blogs.technet.com/b/filecab/archive/tags/file+server+resource+manager+_2800_fsrm_2900_/default.aspx

File Server Resource Manager Overview

The RMS Sharing Application (Preview) in 3 steps

The RMS Sharing Application is now generally available (As of November 19th)! still in preview as of this writing but you can evaluate it now. It is expected to be released in Q4 2013.  It allows you to share any file on any computer or mobile device.

This blog article walks you through the easy steps to get started with RMS Application Sharing.

Step 1 – Browse to https://portal.aadrm.com

After signing in with your existing Office 365 tenant username and password, you can then select the setup program to download based on the device type you want to install this application on.

For this blog, I clicked on the Windows icon.

This downloads a 50 MB zip file named “Microsoft Rights Management sharing application x64.zip”
Simply unzip and run setup.exe, and step through a 1 step setup program to configure RMS Application Sharing.

You must restart your computer after the installation before you can begin protecting content.

The installation installs four components into Programs and Features.

After a restart, you can now right-click on any file on your computer and either protect it in-place, or you can immediately share it with anyone [with a business email account].  Currently you can only share files with a business email account. Consumer email accounts should be available soon.
http://technet.microsoft.com/en-us/dn467883

For example, you can right-click on a PDF file and select ‘Share Protected’ from my Windows Explorer context window.

This brings up the common API for Application Sharing that will be consistent on any computer or mobile device since it all connects through the same SDK.

It then creates an email message with the file name appended with a .pfile extension.

If you send a file that is not able to be opened with an application that is RMS aware, then the notification that the recipient receives is that they are essentially under the honor system. For example, Adobe Reader doesn’t have the ability to manage the rights that the sender of the file is requesting.

So it seems that the potential of the new RMS capability is limited by the applications vendors that embrace and adopt the new RMS SDK. Right now that would be Microsoft Office 2010, 2013 and Foxit PDF Reader. The Foxit RMS Plug-in to the Foxit Enterprise Reader requires a paid license to integrate Foxit Enterprise Reader with AD RMS.
http://officepreview.microsoft.com/en-us/sharepoint-help/sharepoint-compatible-pdf-readers-that-support-microsoft-information-rights-management-services-HA102925502.aspx

Reference:

http://blogs.technet.com/b/rms/archive/2013/08/29/the-new-microsoft-rms-is-live-in-preview.aspx

Microsoft Information Protection Viewer User’s Guide
http://go.microsoft.com/fwlink/?LinkId=302325

Microsoft Information Protection Viewer Administrator’s Guide http://go.microsoft.com/fwlink/?LinkId=302329

http://www.foxitsoftware.com/landingpage/2012/07/Reader-Ads-RMS/?action=success&language=en-us

Enable AADRM in Exchange Online in 2 easy steps

On November 5th, 2013 Microsoft announced the general availability of a hosted version (SaaS) of Rights Management, called Windows Azure AD Rights Management (AADRM).

Azure RMS is now included in Office 365 E3, E4, A3, A4, plans, or you can purchase Azure RMS as a standalone subscription.

To license a user for AADRM, just assign an Office 365 license as you would an Exchange Online license.

I have previously written about the new AADRM in August, and I just finished a post about enabling it for SharePoint Online.

In this post, I will show you how simple it is to enable AADRM for your Exchange Online tenant. It is assumed that IRM has been activated in your tenant, if not, follow the first step in the post referenced above for SharePoint Online.

1. Connect to your Exchange Online account by using Windows PowerShell. View the reference links below if you need help with this step. Better yet, stop here if you are not sure how to do this step.

2. Run the following commands to enable Rights Management within Exchange Online (Pre-requisite – Azure RMS Admin Tool)


That’s it! IRM is now enabled for Exchange Online!


Recommendation

As a best practice, it is a good idea to run a get command before you run a set command so that you can validate that the set command made the change you wanted, and to have a reference in case  you need to roll back. Here are the results of the get command I ran for get-IRMConfiguration prior to running the set command.

Before RMS is enabled, the Outlook Web App interface does not allow a user to protect content within OWA.

After RMS is enabled through the powershell command above, the user who has been granted the RMS license through the o365 portal will now see the following within Outlook Web App. Note: This can take several hours before it will appear.


Reference

http://blogs.technet.com/b/rms/archive/2013/11/11/office-365-information-protection-using-azure-rights-management.aspx

Introducing Windows Azure AD Rights Management (AADRM)

Organizations that are interested in taking advantage of the Rights Management features available in volume licensed versions of Microsoft Office have a new deployment option available:

Windows Azure AD Rights Management (AADRM).

Release Date

AADRM is already available through the Office 365 portal for organizations that are already using Online Services such as Exchange Online and SharePoint Online. The Office 365 E3 SKU is required, and the Office Professional Plus SKU must be used to right-protect content with RMS.

AADRM “stand-alone” is expected to be generally available in the early fall of 2013 and will enable organizations to deploy a highly available RMS infrastructure without the infrastructure or implementation costs of standing it up on premise. It will feature a connector that allows you to connect it with on-premise Exchange and SharePoint servers even if you do not use any other Office 365 service.

Pricing

Pricing is set at $2/user/month for users who need the ability to protect content. It is free to view content that has been RMS protected.

Features

There are at least two major benefits that I can tell from AADRM:

1) Organizational sharing is implied among all Office 365 tenants. If you use RMS to protect a document and you send it to another organization who also uses Office 365, they can view that document. This is an advantage over on-premise RMS which requires an ADFS trust.  Eventually, AADRM will allow you to share with Google IDs (CY14).

2) At GA release in the fall of 2013, AADRM will allow for any type of document to be protected by RMS, not just Office documents.

Limitations

AADRM will not be a perfect fit for all organizations.

  1. Companies that still have Windows XP, Vista, or versions of Office prior to 2010 will need to use AD RMS on-premises and then perhaps migrate to Azure RMS later when their clients have been upgraded.
  2. AADRM is limited to two templates that cannot be customized (“Company Confidential” and “Company Confidential Read Only”). If you need to create custom templates, you need to deploy AD RMS on-premises.

In any case, whether you deploy to the cloud or on-premise, all scenarios require a volume licensed copy of Office. The OEM SKU  (“professional”) that comes bundled from the hardware manufacturer cannot create RMS content.

Mobile Client Support
  • Windows 7.5 and 8 devices natively support RMS
  • Android and iOS devices can support RMS through Nitrodesk Touchdown 7.3
  • Blackberry devices can view RMS content with RMS Viewer
OSX Support

Max OSX v10.5 (Leopard) or later and Office for Mac 2011 Volume License. Non-volume license copies can read RMS but cannot protect content.

RMS Concepts

http://blogs.technet.com/b/rms/archive/2012/04/16/ad-rms-infrastructure-concepts-part-1.aspx

RMS Whitepaper (July 2013)

http://blogs.technet.com/cfs-file.ashx/__key/communityserver-components-postattachments/00-03-58-79-43/Microsoft-Rights-Management-_2D00_-English-_2800_July-2013_2900_.docx

Azure RMS Pricing

http://blogs.technet.com/b/rms/archive/2013/07/16/azure-rms-pricing-and-availability.aspx

RMS Prerequisites

http://technet.microsoft.com/en-us/library/dd772659(v=ws.10).aspx

RMS Team Blog

http://blogs.technet.com/b/rms/

Azure RMS on Technet

http://technet.microsoft.com/en-us/library/jj585024

How RMS protects documents

http://blogs.technet.com/b/rms/archive/2012/04/16/licenses-and-certificates-and-how-ad-rms-protects-and-consumes-documents.aspx

RMS Best Practices Guide

http://technet.microsoft.com/en-us/library/jj735304.aspx

IRM Deployment Guide in Office for Mac 2011

http://www.microsoft.com/en-us/download/details.aspx?id=20825

RMS Forum

http://social.technet.microsoft.com/Forums/en-us/rms/threads

RMS Troubleshooting Guide

http://social.technet.microsoft.com/wiki/contents/articles/13130.ad-rms-troubleshooting-guide.aspx