
In my opinion, the best way to learn a technology such as SAML is building a hands-on lab environment. In this blog we’ll explore how to create a SAML Application in Azure AD, using the “Azure AD SAML Toolkit” app.
There are two types of SAML Applications:
– Service Provider Initiated (aka “SP Initiated”). This means that the end-user will navigate to the web application first and then be directed back to the IDP to authenticate, and then the end-user will go back to the application to present the authentication token.
– Identity Provider Initiated (aka “IDP Initiated”). This means that the end-user will navigate to the IDP, in this case Azure is the IDP, so the list of applications will be found at “myapps.microsoft.com.”
Experts may read the simplistic explanations above and notice there are exceptions to these definitions, but to keep things simple we are going with those definitions.
The “Azure AD SAML Toolkit” was written to support SP Initiated SSO.
Getting Started
If you already have a test environment or if you are brave enough to test in your production environment, then skip step 1 and proceed to step 2.
Step 1) Sign up for a Office 365 trial tenant (here)
Step 2) Sign into the Azure Portal (this is the IDP) here: https://portal.azure.com
Step 3) In the search box type in “Azure Active Directory”
![]()
Step 4) Click Add > Enterprise Application

Step 5) Type “Azure AD SAML Toolkit” and then click on the application

Step 6) Click Create

Step 7) Click Single sign-on in the left navigation then click SAML on the right

Step 8) In Step One of “Basic SAML Configuration” Click Edit

Step 9) In the Sign on URL enter: https://samltoolkit.azurewebsites.net/

PRO TIP: If you leave this field blank, you are configuring an app for “IDP Initiated” SSO instead of “SP Initiated SSO.” This will help you in the future when troubleshooting why an IDP Initiated app is not working, clear this field and it may start working.
Step 10) In the Reply URL (otherwise known as the Assertion Consumer Service URL) enter: https://samltoolkit.azurewebsites.net/SAML/Consume

Leave the Entity ID with the pre-populated value, it should be:
https://samltoolkit.azurewebsites.net
Step 11) Click Save
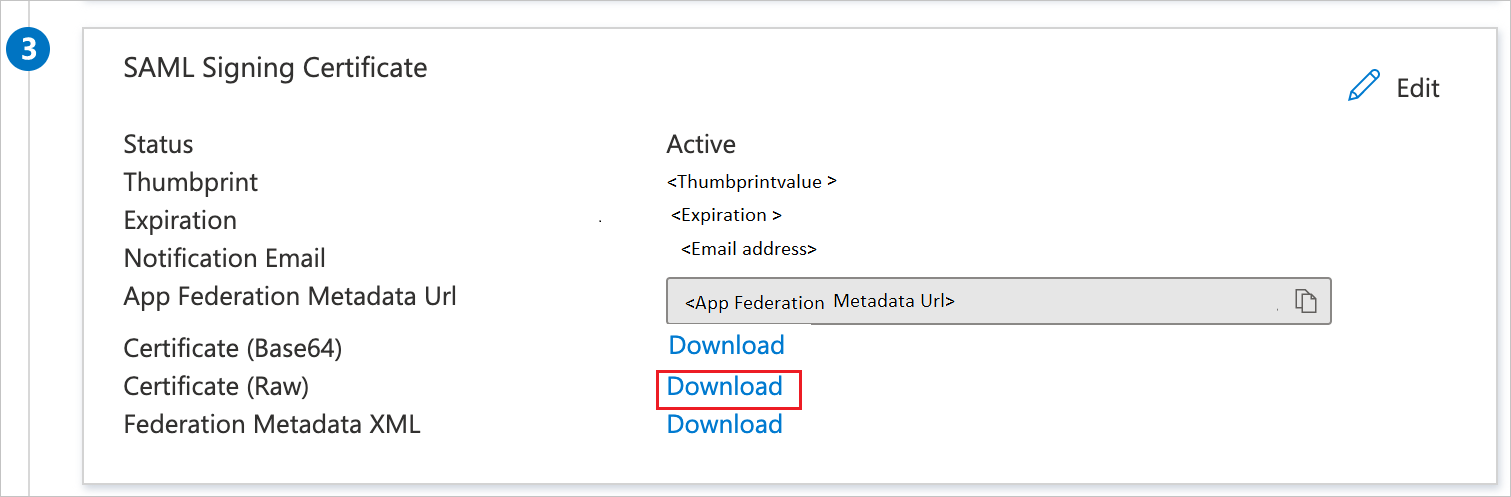
Step 12) On step three click Download next to “Certificate (Raw)”
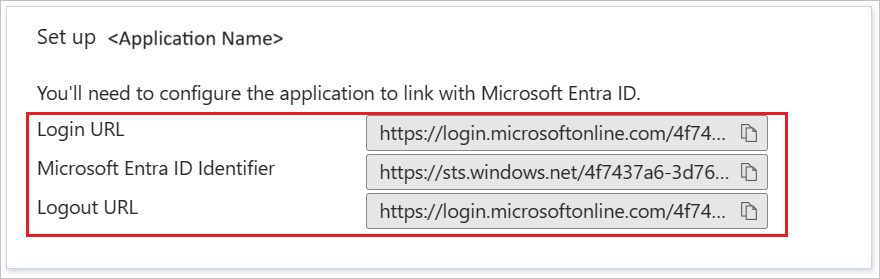
Step 13) On Step four “Set up Azure AD SAML Toolkit” copy the values shown into Notepad or your favorite text editor. You’ll need these in a future step
Step 14) On the left navigation select “Users and Groups” and then add the user you are signed in with (this user will be used in a future step)

Step 15) Browse to the Azure AD SAML Toolkit website here: https://samltoolkit.azurewebsites.net
Step 16) Click Register

Step 17) Enter the email address associated with the user account that you added to the SAML Account in step 14 above
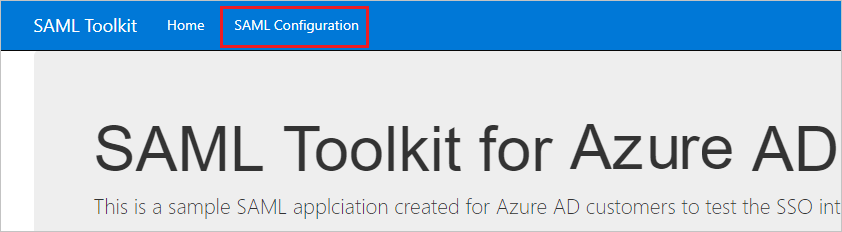
Step 18) Click SAML Configuration on the top navigation
Step 19) Click Create

Step 20) Paste the values that you copied from step 13 above, and upload the certificate from step 12 above

Step 21) Copy Sign-on URL, Identifier and ACS URL values on SAML Toolkit SSO configuration page and paste into respected textboxes in the Basic SAML Configuration section in the Azure portal

Step 22) Test it out! Sign into Myapps.Microsoft.com and find the Azure AD SAML Toolkit. Click on it and then you should see a button to Log in. Click on this button to initiated an SP-Initiated sign-in.

If it works, you’ll be brought back to the same configuration page you used to create the app. This is just a simple app to show how SSO works with Azure AD.
